Disclaimer: Some photos in this tutorial were taken from the internet, not all are for Ubuntu 16.04.3 installation, but generally are the same.
Users are advised to backup important files in your laptop before you proceed.
1. Download the Ubuntu ISO file from the link
- Ubuntu 16.04.6 LTS (Xenial Xerus)
- Choose a desktop image, not a server
- Choose according to the bits of your computer’s processor
2. Download the executable Rufus to create bootable Live USB drives for Ubuntu
- https://rufus.ie/en_IE.html
- Under the Download section on the webpage, choose the first option (i.e. Rufus 3.8)
3. Create a bootable Ubuntu USB drive
- Insert an empty USB pendrive into your computer, USB 3.0 recommended.
- Run the downloaded Rufus
- For the Device option, choose the USB drive inserted.
- For the Boot selection option, click ‘SELECT’ and choose the downloaded Ubuntu ISO file (i.e. ubuntu-16.04.6-desktop-amd64)
- Press START
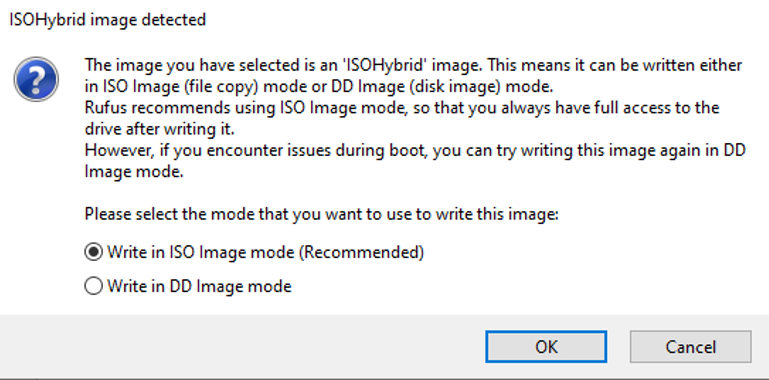
- This window will pop out, click ok
**Don’t remove the USB drive yet
4. Shrink some volume from your hard disk for installation of Ubuntu (for Windows)
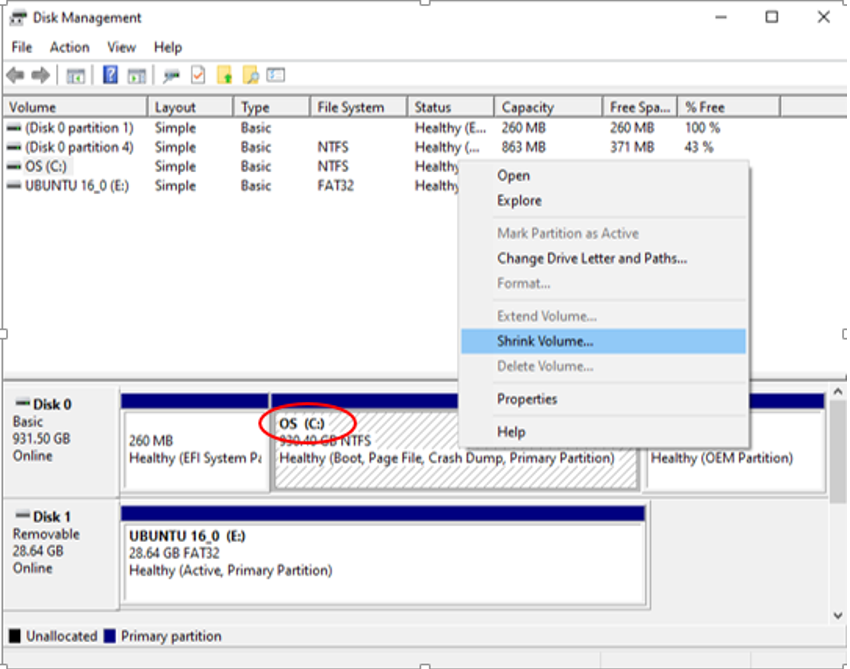
- search Disk Management
- Right-click the volume that you want to shrink( it means that you will reduce the volume of the disk, for example, OS(C:)
- Click Shrink Volume
- Enter the volume that you want to shrink ( 1GB = 1024 MB), at least 25GB
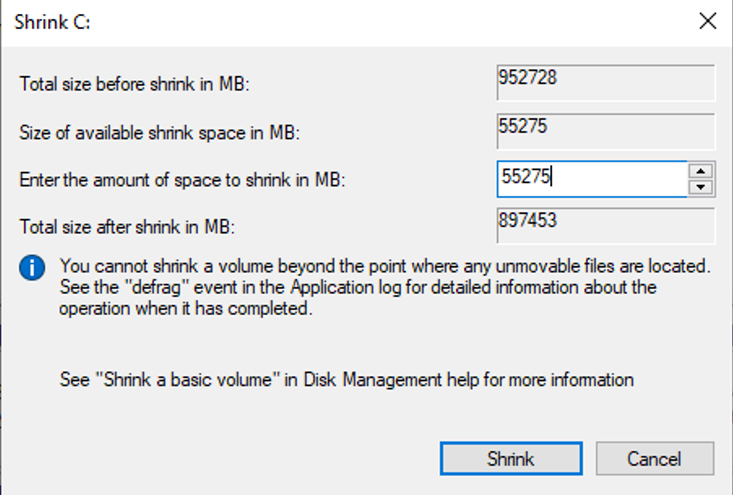
- Click Shrink
Following steps might vary since the different laptop has different interface and settings. Try to search on Google or Youtube.
It was applied on Asus Windows 10.
5. Disable fast startup and secure boot
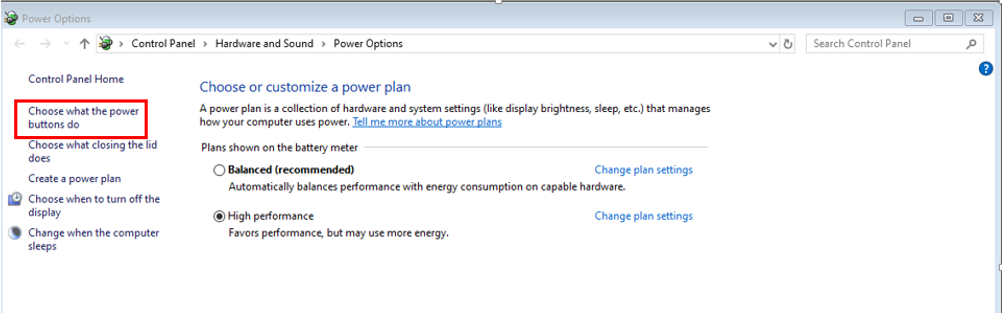
- To disable Fast Startup, press the Windows Key + R to bring up the Run dialog, type “powercfg.cpl” and hit Enter. The Power Options window should appear. Click “Choose what the power buttons do” from the column on the left.
- Scroll down to “Shutdown settings” and uncheck the box for “Turn on fast startup”
Note: If these options are greyed out then you may need to click “Change settings that are currently unavailable”.

- Click the “Save changes” button to apply the changes
- Before jumping to disable Secure Boot, let’s find out if your PC has Secure Boot.
- Open Windows Defender Security Center, and click on Device Security.
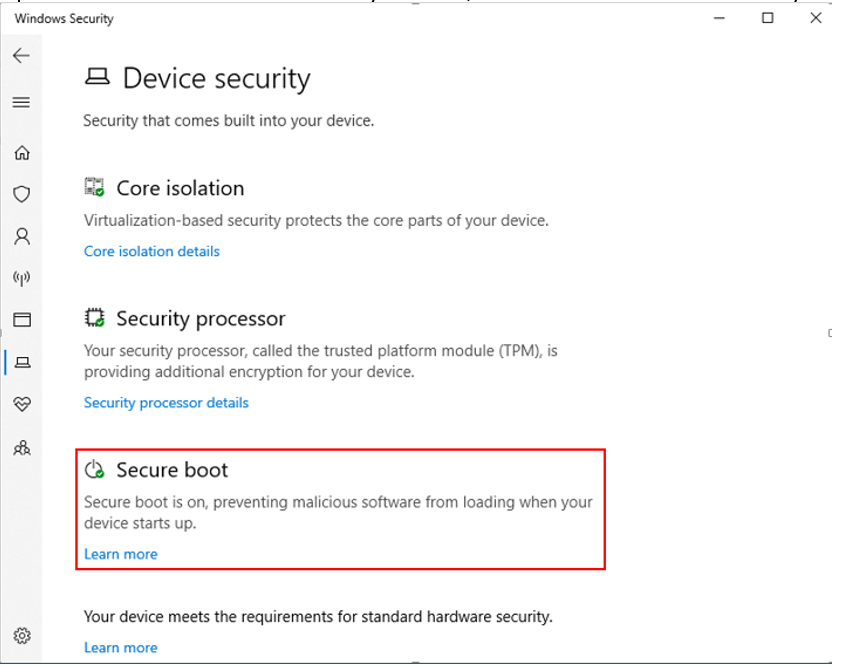
- Assumed secure boot is available and turned on, now can disable it.
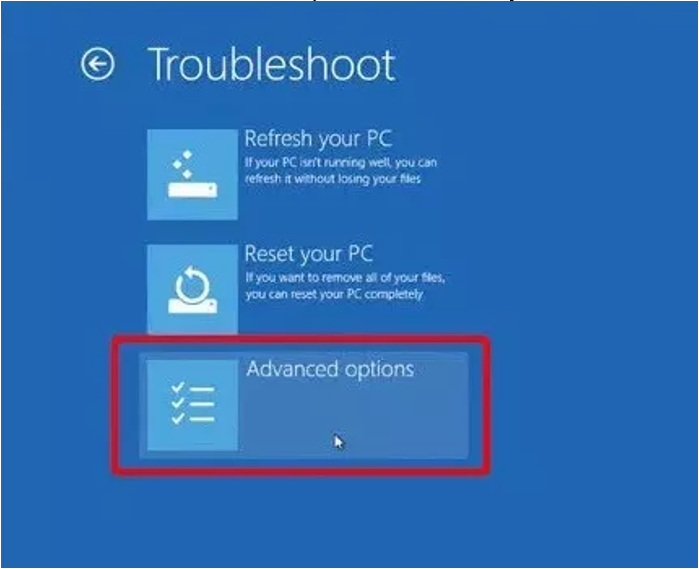
- Hold “Shift” and click Restart
- Choose “Troubleshoot” and pick “Advanced Options“.
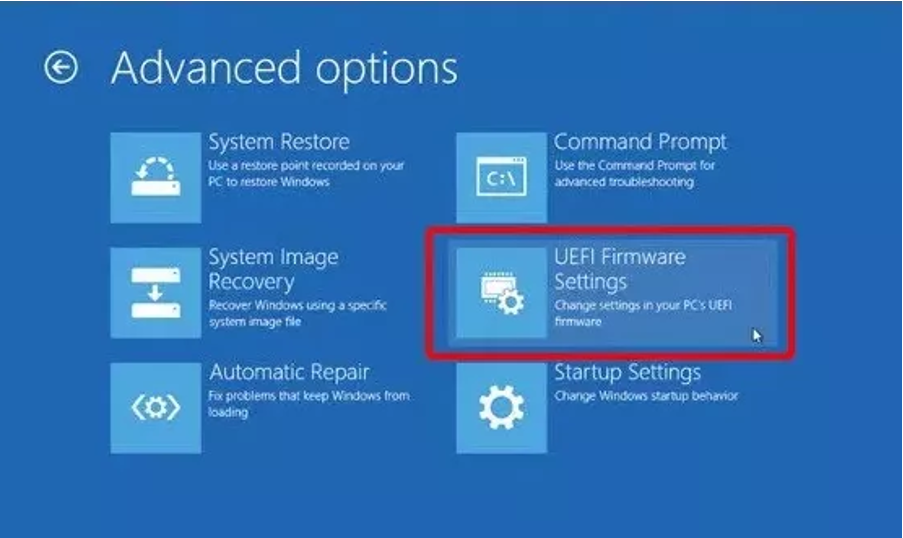
- Go to “UEFI Firmware Settings” and then click “Restart“.
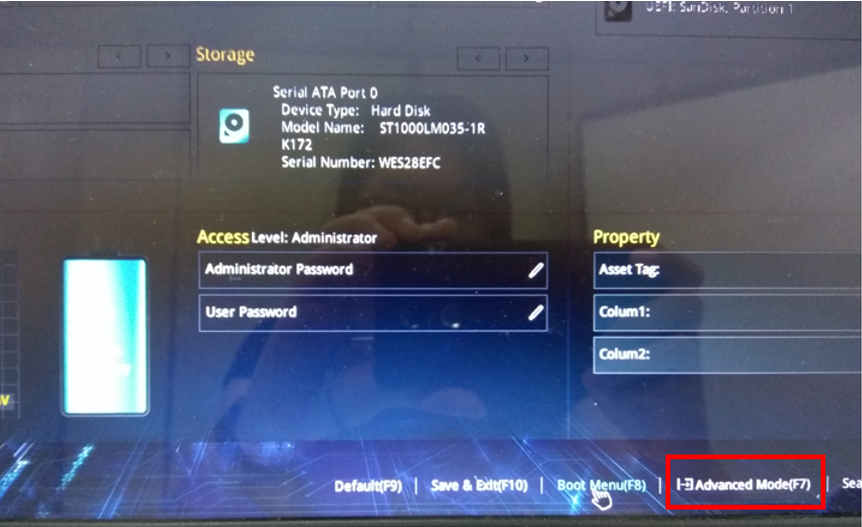
- Hit on “Advanced Mode” located at the bottom or press F7
- Click “Security”, then scroll down to “Secure Boot”
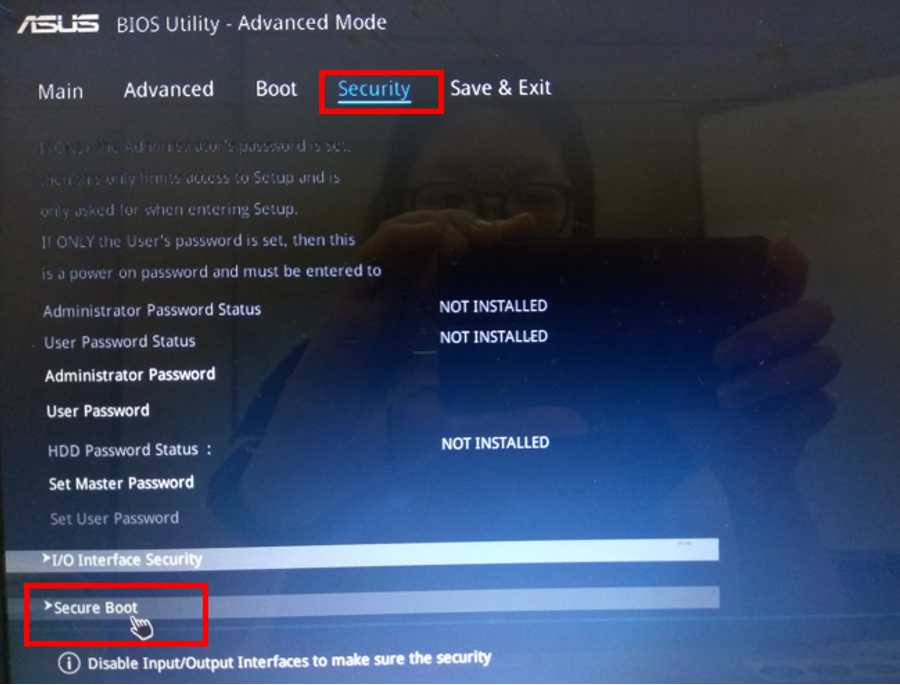
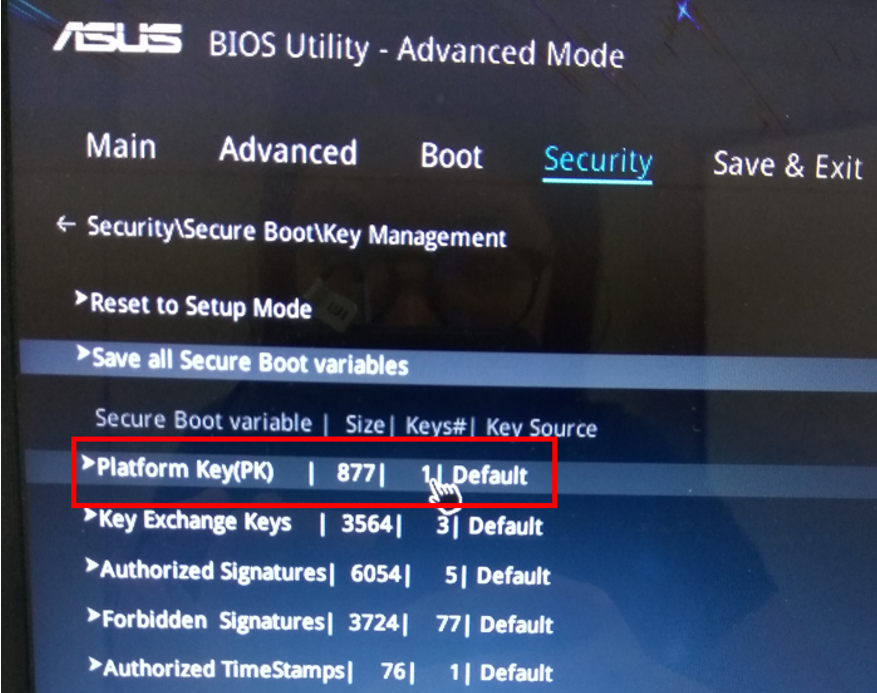
- Go to “ Key Management”

- Click “Save all Secure Boot Variable”

- Choose the one with a USB

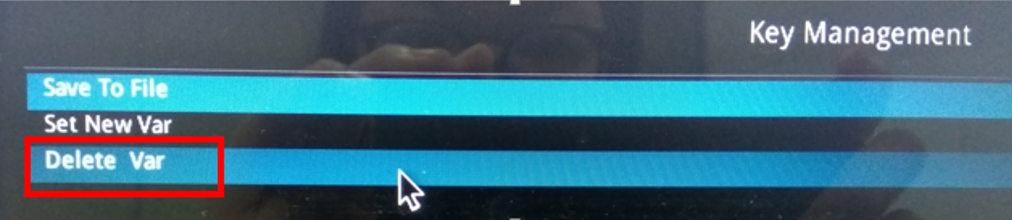
- Go to “Platform Key” then hit on “Delete Var”. The secure boot was disabled since the PK key was deleted.
- Click “Save & Exit” then “Save Changes and Exit”
6. Open device
- Hold “Shift” and click Restart
- Click “Use a device”

7. Install Ubuntu
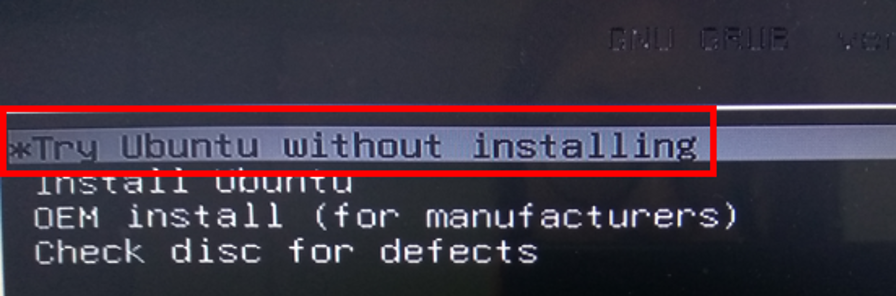
- You might encounter this interface, choose “Try Ubuntu without installing”
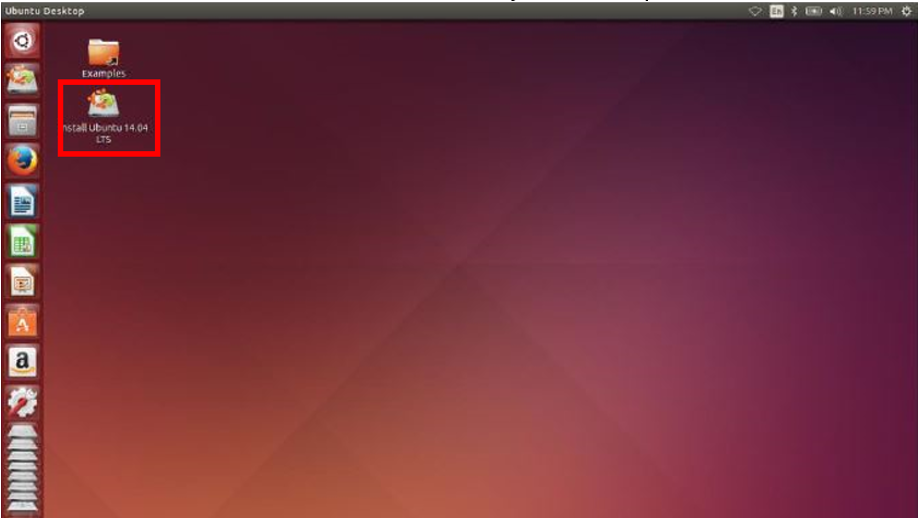
- Click the “Install Ubuntu <Version>” Icon on your desktop
- Choose English > Continue
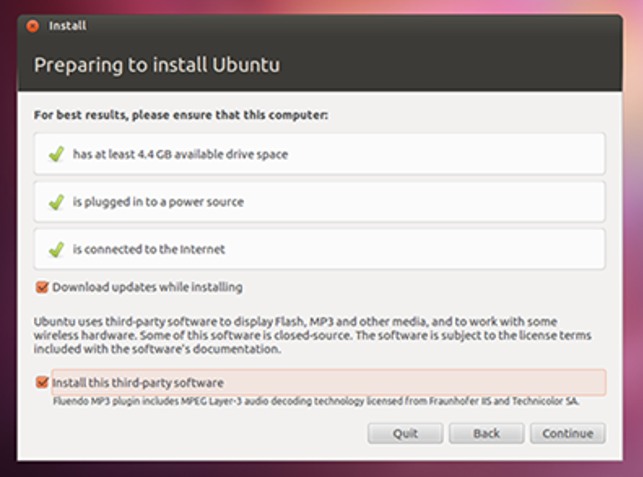
- Connect to a network (Wi-Fi), if UTM Wi-Fi can’t be reached, use your data or something else. Internet connection is mandatory for installation later.
DO NOT TICK “Download updates while installing”, but you may tick “Install third-party software” if you think you need it.
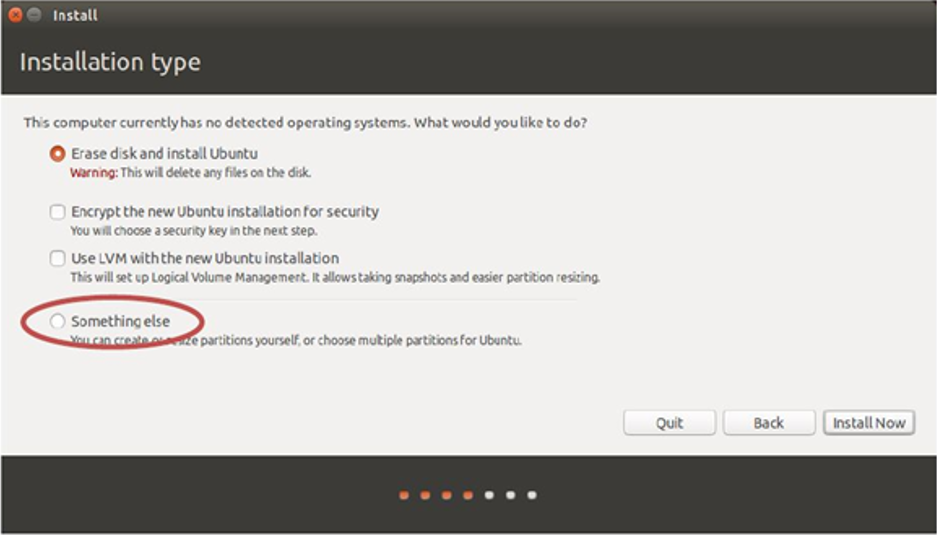
- For Installation Type, click “Something else”( IF YOU CHOOSE to ERASE DISK YOUR WINDOWS WILL BE DELETED)
- There will be a few partitions shown in the device column
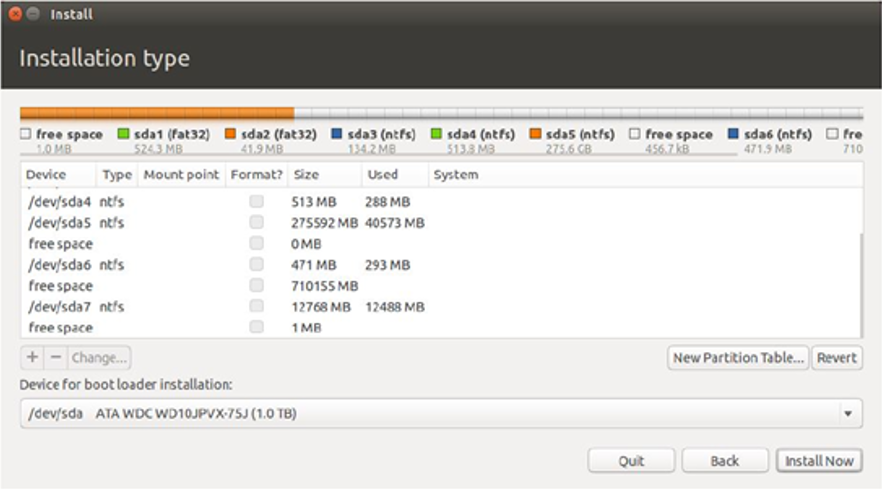
- Left-click the correct free space that was created just now ( Noted that there is little free space hence choose based on the size)
(For example, if you shrink 102400 MB from your hard disk just now, the size of the free space should be around this digit)
- Then click the “+” or “Add” button
- You will see something like this
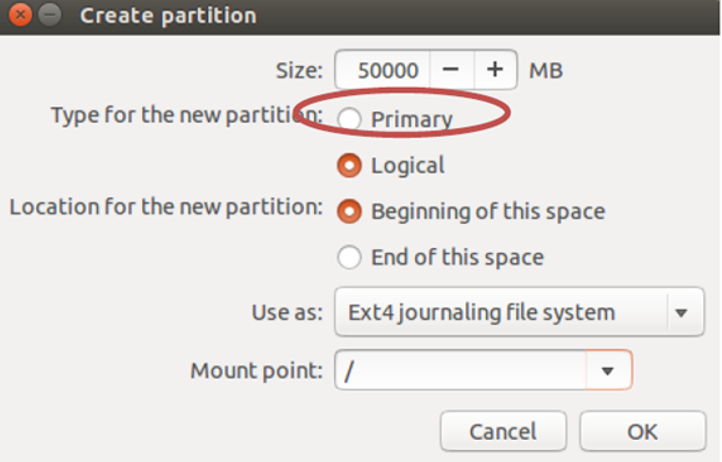
- For the new partition, choose “Primary”.
- For “Use as“ choose “swap area”.
- Enter the size (size should be 2 times computer RAM, size=(PC RAM)x 2 x 1024
i.e. 8GB RAM pc, size = 8x2x1024=16384
- Then click “OK”.
- Left-click the “free space” one more time ( the free space now supposedly have a smaller size now), then click the “Add” again.
- Choose “Primary” for the type of new partition, then click “mount point”, then choose “/” (the “/” means root, whatever files or programs that you download using Ubuntu will be kept in this space)
- Click “OK”
- Press “Install Now”
- Choose your location(Kuala Lumpur)
- Choose English(US).
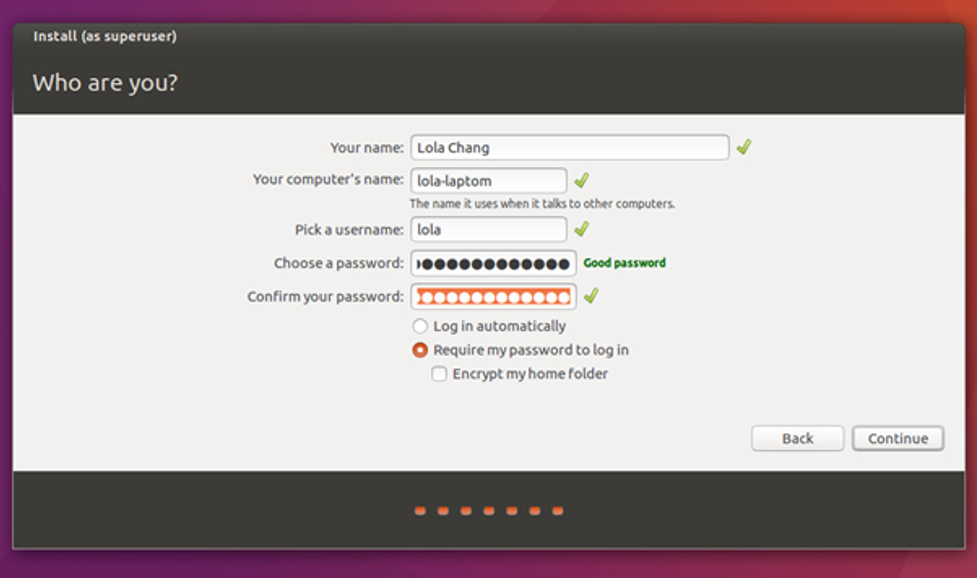
- Enter a name to identify your computer, a username, and a password. The password must remember, it will be used to access the super user and enter the root of the system.
- Click “require my password to log in” or “log in automatically” >Continue
- After finish installing, click “Restart”
- After reboot, the system should boot into the GNU GRUB menu.
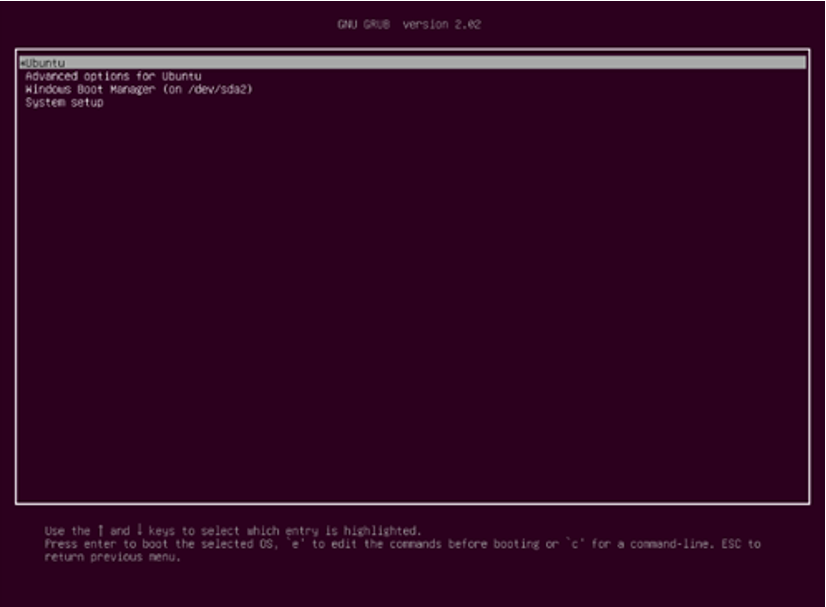
8. In case the GRUB menu is not displayed
(you might notice your laptop still run Windows instead of Ubuntu)
- Hold the Shift key, and click restart (if your computer is already turned on)
- Or choose “System Setup” to enter BIOS (if you restart your laptop and saw this)
- IF THE ABOVE WAYS DON’T WORK FOR YOUR COMPUTER, FIND OUT THE WAY FOR YOUR COMPUTER TO ENTER BIOS
- Go to Troubleshoot > Advanced options> UEFI Firmware settings>Restart>Boot tab
- Ensure your Boot Mode is UEFI, NOT LEGACY
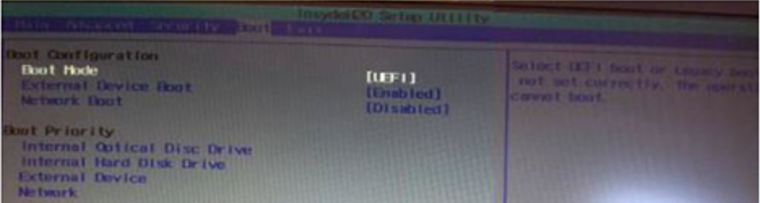
- Go to boot priority, change the boot order sequence by moving Ubuntu to top
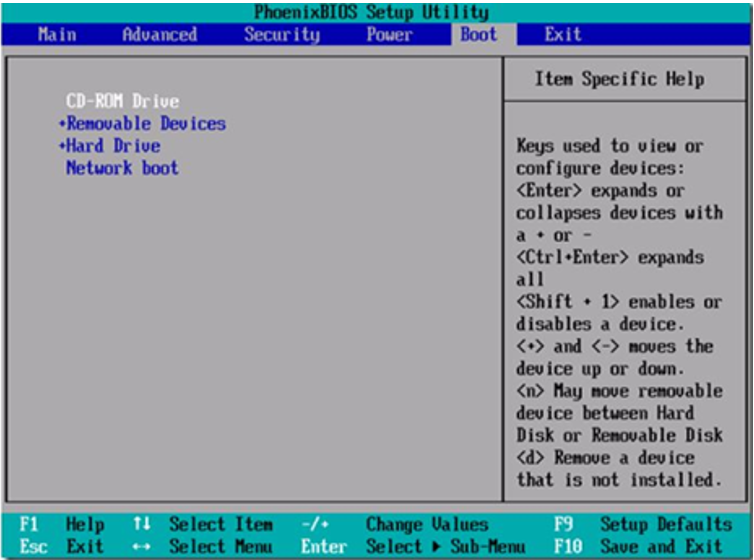
(different computer has a different layout and ways to change the boot sequence, some Acer laptops need to press on F5 or F6 to change the sequence. Go Google or YouTube search if you can’t find a way to change the order)
- Save changes and exit
For uninstalling Ubuntu:
https://www.youtube.com/watch?v=zyOBF2ePvHY
Reference:
https://help.uaudio.com/hc/en-us/articles/213195423-How-To-Disable-Fast-Startup-in-Windows-10
https://www.technorms.com/45538/disable-enable-secure-boot-asus-motherboard-uefi-bios-utility